Motorbike Safety on the Ha Giang Loop: Gear, Checks, and Technique
Most Ha Giang Loop crashes aren't bad luck. They're a rider going faster than the curve allows, braking wrong on a descent, or wearing shorts and sandals on a road that punishes both. This is the practical side: what to wear, what to check before you leave each morning, and how to actually ride these roads.
Booking choice: Ride through Dong Van and Ma Pi Leng, take the Nho Que boat trip, then spend the second night in Du Gia. Check dates for the 3-day Easy Rider ↗
Your selections need confirmation. Adjust them in the trip comparison below.
In brief: Match the named stops and overnight towns to your plan. Confirm the riding format, travel days and inclusions before choosing a departure.
How do you actually ride the Ha Giang Loop safely?
Safe riding here comes down to four things done consistently: full protective gear worn every day regardless of heat, a real bike inspection each morning before you leave, conservative speeds well under what feels natural on a mountain road, and braking technique that uses both brakes progressively instead of grabbing one. No reliable percentage reduction in accidents is established by this guide.
What trips riders up isn't usually a single dramatic mistake. It's a string of small shortcuts: skipping the gear because the morning felt warm, trusting a rental bike without testing the brakes, riding at a pace set by adrenaline rather than what the curve ahead actually allows. Each shortcut is survivable on its own. Stacked together across a multi-day trip, they add up to most of the crash statistics on this route.
The road itself isn't unusually cruel. Paved sections are generally in decent shape, and the scenery that draws people here comes with genuinely manageable curves and grades for anyone riding at an appropriate pace. It only turns dangerous when the rider brings highway habits, bald tires, or no protective layer to a route built for neither.
| Safety factor | Done properly | Skipped or done poorly |
|---|---|---|
| Protective gear (helmet, gloves, long layers) | Injuries stay minor even in a fall | Road rash and broken bones from falls that would otherwise be minor |
| Speed (conservative on technical sections) | Time to react, controlled stopping distance | Little to no reaction time, harder impacts |
| Braking technique (both brakes, progressive) | Controlled stops, manageable descents | Skids, lock-ups, or brake fade on long descents |
| Pre-ride bike check | Problems caught before they matter | Preventable mechanical failures mid-route |
| Weather judgment | Delayed starts or shelter when conditions are bad | Riding blind through fog or losing traction in rain |
What protective gear do you actually need?
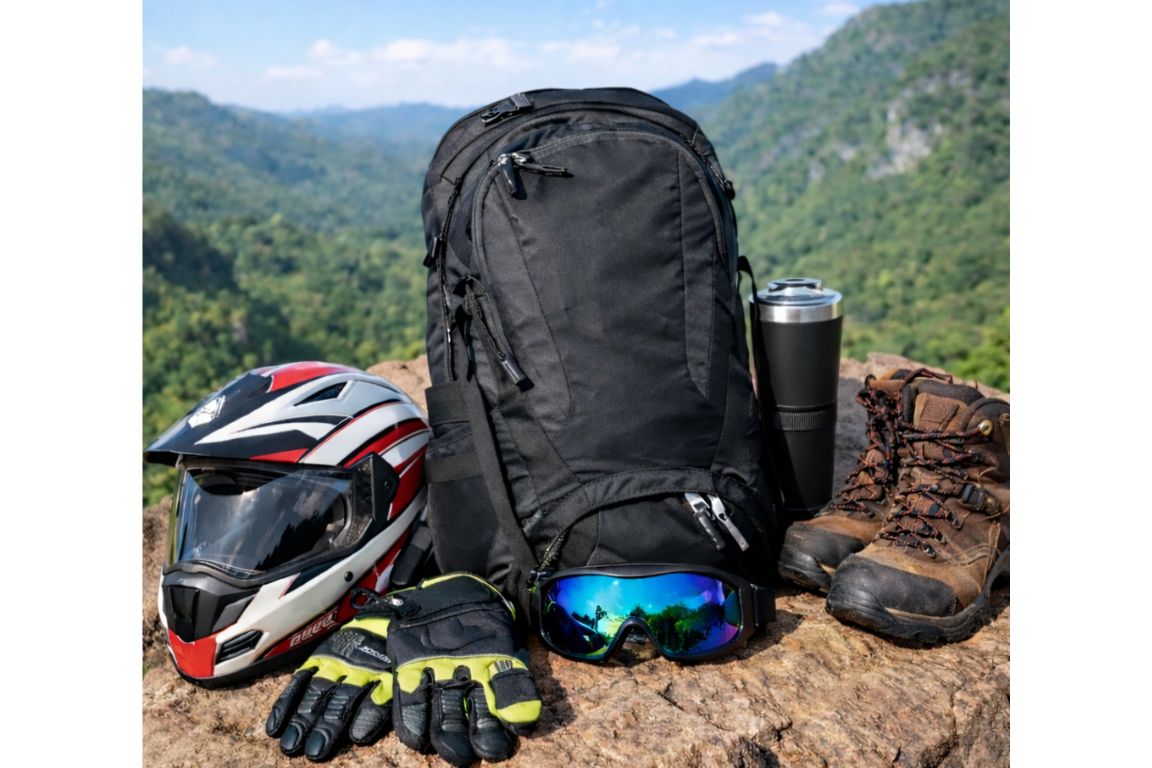
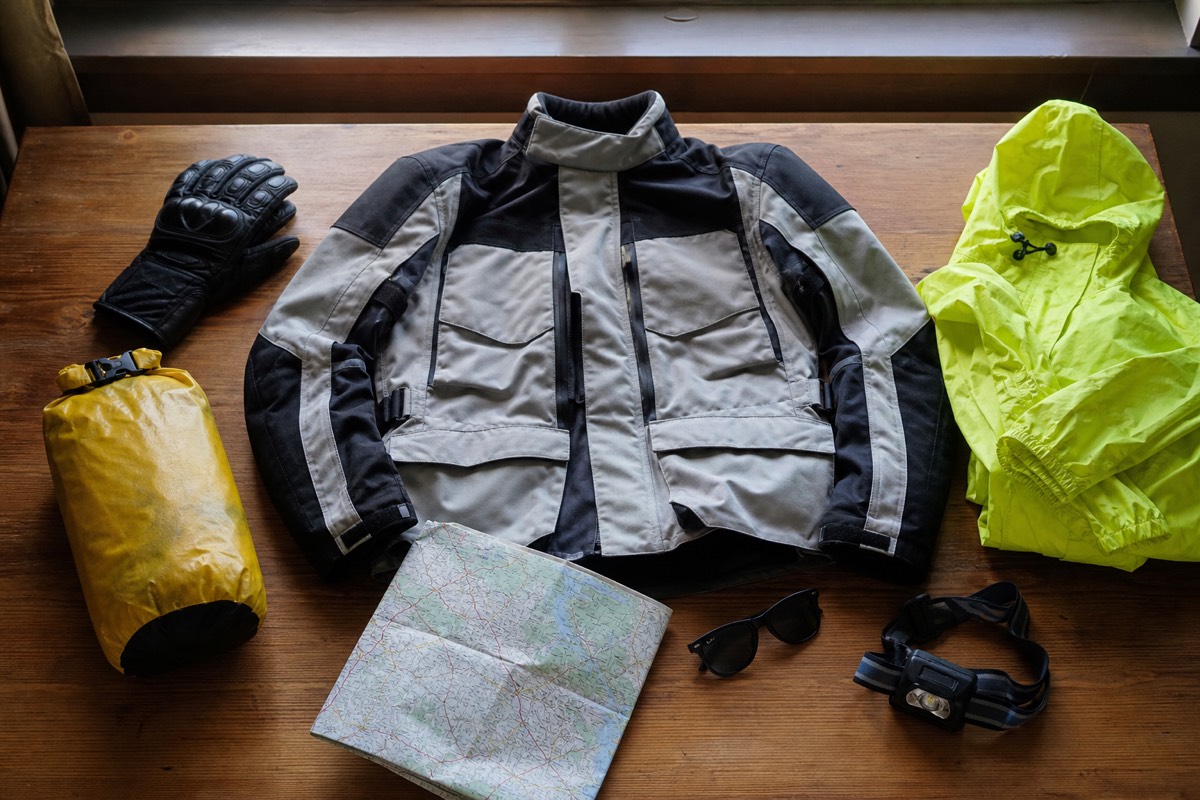
A properly fitted helmet is non-negotiable, followed by gloves, long sleeves and pants, and closed-toe shoes with ankle support; skip any of these and an otherwise minor fall turns into road rash, broken fingers, or worse. None of this is exotic equipment. Most of it is available cheaply in Ha Giang city if you didn't bring your own.
Full-face helmets protect more of your head and face than half-shells, though they run hotter. Whichever you choose, fit matters more than style: it should sit level rather than tipped back, feel snug around the whole circumference, and stay in place with the chin strap fastened when you shake your head. Rental helmets vary wildly in quality, so it's worth checking yours rather than assuming it's adequate.
Gloves matter more than people expect, because the instinctive reaction in a fall is to put your hands out first. Bare palms on asphalt at even modest speed is a genuinely painful, easily avoidable injury. Long sleeves and long pants, ideally denim or a sturdy synthetic rather than thin cotton, do the same job for your arms and legs. Shorts and sandals are common mistakes on hot days and consistently among the worst decisions riders make here.
| Gear item | What it protects against | Minimum acceptable option |
|---|---|---|
| Helmet | Head injury, the leading cause of motorcycle fatalities | Properly fitted half-shell; full-face is better |
| Gloves | Palm and finger injuries from instinctive falls | Any real glove, motorcycle-specific is ideal |
| Long sleeves and pants | Road rash, sunburn | Denim or synthetic hiking fabric, not thin cotton |
| Closed-toe shoes with ankle support | Broken ankles, crushed toes | Hiking boots or sturdy sneakers, never sandals |
| Eye protection | Dust, insects, debris at speed | Sunglasses or a helmet visor |
What should you check on the bike before each day's ride?
Test the brakes with a few real stops from 20-30 km/h, check tire tread and sidewalls, confirm chain tension has around 2-3cm of play, and verify every light works, all before leaving the rental shop or your guesthouse each morning. This takes five to ten minutes and catches most of the mechanical problems that otherwise strand or injure riders mid-route.
Brakes deserve the most attention. Squeeze both levers looking for a firm, responsive feel rather than sponginess or grinding, and do an actual stopping test rather than just checking that the lever moves. A soft or unreliable front brake on a mountain descent is not something you want to discover for the first time on a steep grade with a curve at the bottom.
Fuel planning matters more than it seems on a small-tank rental. Typical bikes carry 4-5 liters, good for roughly 120-150km, and towns with fuel are spaced 50-70km apart. Starting each day with a full tank and topping off whenever you pass a station, rather than waiting until the gauge looks low, avoids the genuinely inconvenient experience of running dry between towns.
| Check | What you're looking for | Why it matters |
|---|---|---|
| Brakes | Firm response from real stops, no grinding or sponginess | Brake failure on a descent is one of the more dangerous mechanical issues |
| Tires | Adequate tread, no sidewall cracks or bulges | Blowouts and slides on worn rubber are largely preventable |
| Chain | About 2-3cm of vertical play, not dry or rusted | Too loose risks derailment; too tight strains components |
| Lights | Headlight, brake light, turn signals all functional | Fog, tunnels, and late finishes happen more often than planned |
| Fuel | Full tank at the start of each day | Small tanks and 50-70km gaps between stations leave little margin |
How do you brake safely on steep mountain descents?
Braking technique depends on the motorcycle, load and conditions. Obtain practical instruction before mountain riding; a fixed front/rear percentage is not reliable guidance for every descent.
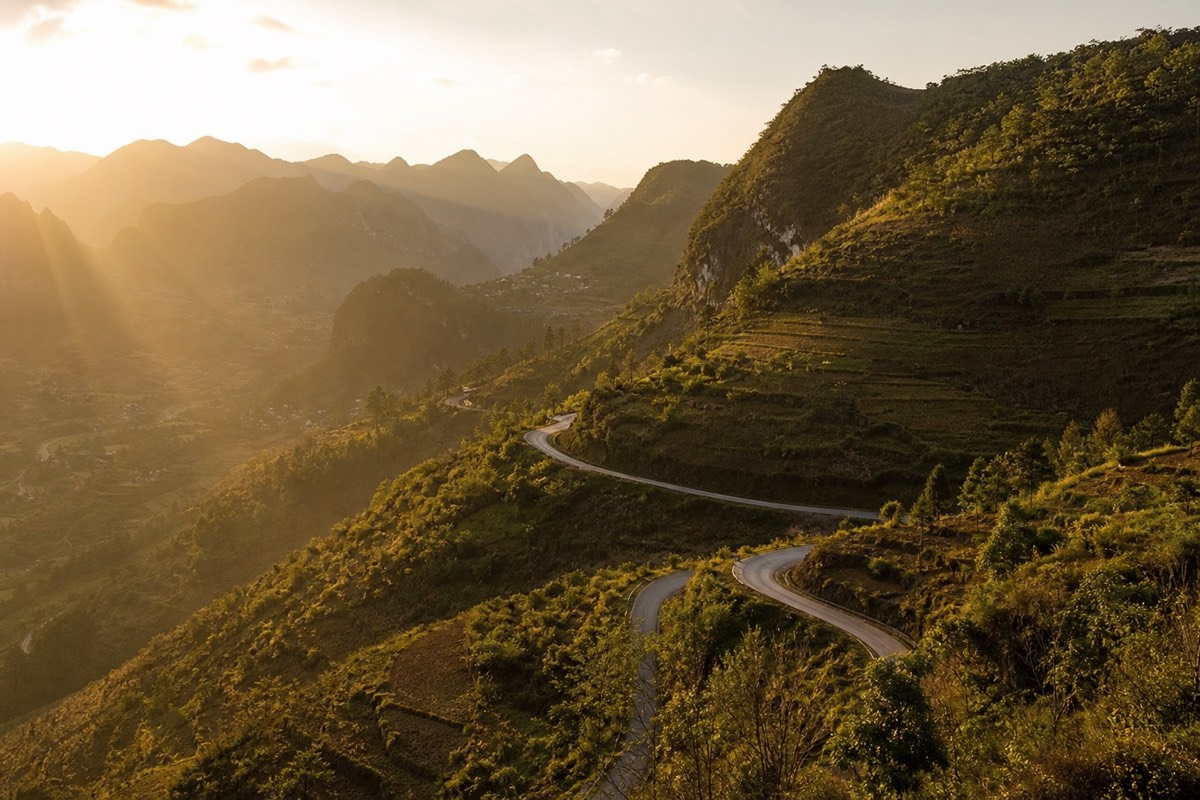
Engine braking does most of the real work on a sustained downhill. Dropping into second or third gear and letting compression slow the bike, with only brief supplementary taps on the brakes, keeps the pads cool and avoids the fade that comes from riding the brakes continuously down a long grade. If your lever starts feeling spongy or your stopping distance seems to be growing, that's brake fade, and the fix is to slow down significantly and let things cool before continuing.
None of the rental bikes on this route reliably have anti-lock brakes, so threshold braking is a skill worth practicing somewhere low-stakes before you need it on a curve. The feel for it is subtle: a slight vibration or lightness in the front end tells you the wheel is near lock-up, and backing off the pressure fractionally keeps you at maximum stopping power without sliding.
What's the right way to take curves on mountain roads?
Brake before you enter the curve rather than during it, look through to where you want to exit rather than at the curve itself, and take the widest line the lane allows by entering from the outside and clipping the inside at the apex. This combination, sometimes summarized as slow in, fast out, keeps you upright and in control through the tightest switchbacks.
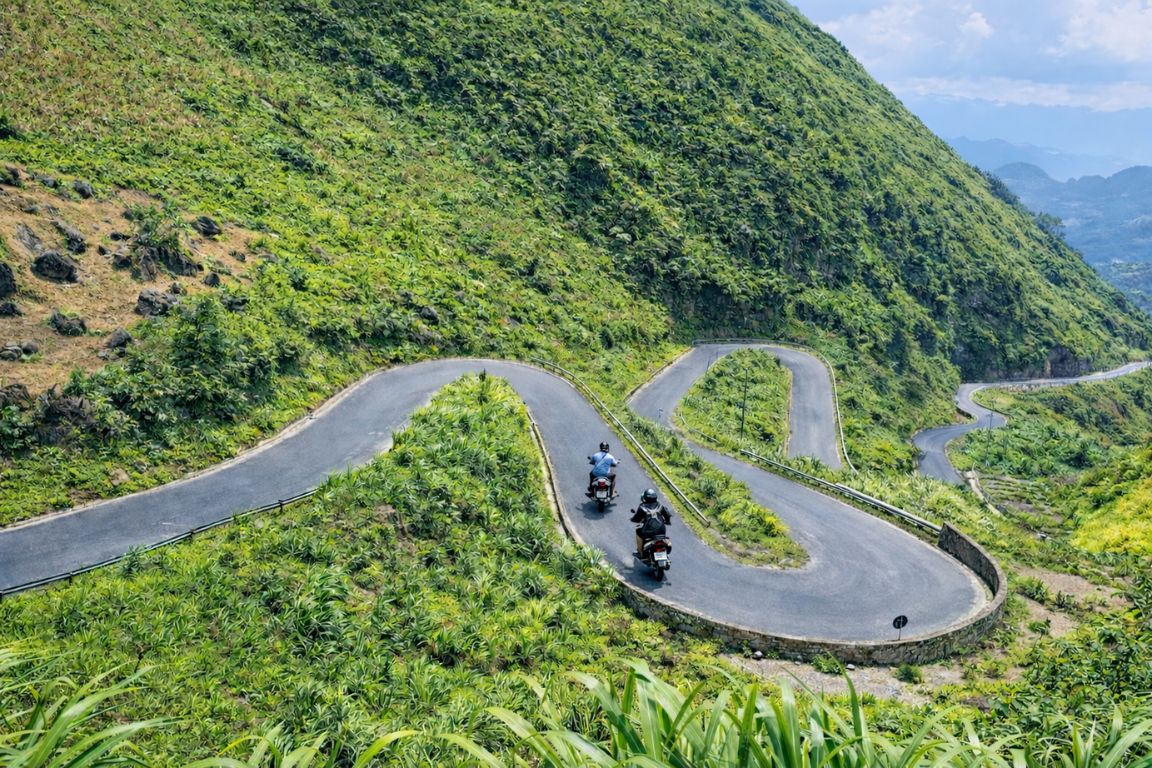
The visual habit matters more than most riders expect. Where your eyes go, the bike tends to follow, so fixating on a gravel patch or a cliff edge is a reliable way to steer toward it. Looking through the curve toward your exit point, even while you're still entering, keeps your line smooth and your reactions ahead of the road rather than behind it.
Gravel deserves specific mention because it collects in exactly the spot most riders want to use: the apex of a curve, especially on downhill outside corners where traffic tracks wide. Spot it early, finish your braking before you reach it, and hold a steady, gentle throttle through it rather than adjusting speed while you're on the loose surface.
How fast should you actually be riding?
Technical sections call for roughly 25-35 km/h and open straight stretches top out around 40-50 km/h, both well below what feels like a normal cruising pace if you're used to flat highways, where 60-80 km/h is the speed most commonly cited as the root cause of serious crashes here.
The gap between what feels slow and what actually is slow enough tends to surprise people the most. A speed that feels almost timid on an open Vietnamese highway is often already at the edge of control on a Ha Giang switchback, particularly with gravel in the mix or a passenger on the back. Riders who find themselves consistently overtaking others on the loop are usually the ones setting themselves up for the statistics in the first section of this guide.
| Road type | Reasonable speed | Speed that causes most serious crashes |
|---|---|---|
| Technical curves, switchbacks, cliff sections | 25-35 km/h | 50+ km/h |
| Open straight stretches | 40-50 km/h max | 60-80 km/h |
| Wet or foggy conditions, any section | Adjust speed and following distance to actual grip, visibility and traffic. There is no universal percentage adjustment that makes rain riding safe; stop when conditions exceed your abilities. | Maintaining normal pace regardless of conditions |
How do you handle rain, fog, and other bad weather on the bike?
Adjust speed and following distance to actual grip, visibility and traffic. There is no universal percentage adjustment that makes rain riding safe; stop when conditions exceed your abilities.
Wet pavement changes the physics of everything: stopping distances roughly double, and traction disappears fastest exactly on white lane markings and metal expansion joints, which is why experienced riders route around them even if it means a slightly wider line. Smooth, gentle inputs on the throttle, brakes, and steering matter more in the rain than any other single technique, since sudden movements are what actually break traction.
Cold at altitude, particularly December through February mornings, is a separate hazard worth layering for: base layer, insulation, and a windproof outer shell, with attention to hands and neck where heat loss concentrates. Heat in the hotter months brings the opposite problem, and 3-4 liters of water across a riding day, roughly double normal intake, is the standard recommendation to avoid dehydration and heat exhaustion on long stretches in the sun.
| Condition | Adjustment |
|---|---|
| Rain | Adjust speed and following distance to actual grip, visibility and traffic. There is no universal percentage adjustment that makes rain riding safe; stop when conditions exceed your abilities. |
| Fog under 50m visibility | Wait for it to clear, usually mid to late morning, rather than ride through it |
| Cold mornings, Dec-Feb | Layer properly, warm-up stops every 60-90 minutes if temperatures are low |
| Heat, especially around October | 3-4 liters of water daily, shade breaks during midday |
| Strong crosswinds on exposed passes | Reduce speed, lean into the wind, firm grip on the bars |
What should you do if you crash or break down?
Check yourself for injuries first, move off the road if you're able to, turn off the engine, and apply basic first aid before deciding whether to continue; for anything serious, call your rental shop and, if needed, the local emergency numbers (113 for police, 115 for ambulance), and document the scene with photos for your insurance claim.
Most falls on this route are minor enough that a short rest and some cleaning of scrapes is all that's needed to keep going. The judgment call comes in for anything past that: a hard hit to the head even without obvious symptoms, an injury that limits movement, or a mechanical failure that leaves the bike unsafe to continue riding. In any of those cases, notifying your rental shop immediately, regardless of whether damage seems minor, keeps your options open rather than discovering a problem later far from help.
This is also where the case for riding with at least one other person, whether a partner, a small group, or an 4 days: small-group Easy Rider loop, becomes obvious. Managing a crash alone on a quiet stretch of mountain road is a genuinely different experience than having someone there to help immediately. If solo self-ride doesn't sound appealing after reading this, it's worth comparing it against what a guided tour actually looks like day to day.
Who should skip self-riding and book an Easy Rider tour instead?
Anyone without real experience on a manual motorbike, anyone nervous about mountain roads after reading the above, and anyone traveling with a partner who doesn't ride should seriously consider an Easy Rider trip, where an experienced local rider handles the bike and you ride as a passenger over the same roads.
This isn't a consolation option. It's how a lot of travelers see the loop's best scenery without taking on the technical risk themselves, and it removes the licensing question entirely since you're not the one operating the vehicle. Before choosing either path, it's worth understanding whether you'd need a license to ride yourself, since that alone changes the calculation for a lot of travelers.
For anyone still weighing the honest overall risk picture rather than just the technique side covered here, our companion guide on whether the Ha Giang Loop is actually safe covers the accident data and seasonal risk in full.